*Make sure not to practice these archery shooting tips for top level shooting form without correcting your bad habits. To make sure that are ready to advance your skill level, first read how you can cure the dreaded "Target Panic".
Archery shooting tips, do you need them? Boy it seems like a loooong time ago, but in my "past life" I was a Factory Sponsored Pro 3D shooter for Mathews Archery. At some point about 10 years ago I stopped traveling around the country chasing 12 rings and X counts.
However, even though I may not still shoot like a pro, my love for shooting has never left me, and neither have the tips that need to mastered in order to shoot at a professional level. For some of you that have been immersed in the sport for many years, you may find it interesting that I still carry around my old Carter Big Kid 3Ds and other back tension thumb trigger releases. In fact, I still shoot them often.
*In order to shoot like a pro, you need a bow that is set up properly. Check out our #1 Bowhunting Setup Tip for this Season!
Although I haven't competed in years, I still follow the same archery form practices that not only I first embraced all the way back in the early 90s, but the form that the majority of high-level 12-ring, spot and dot shooters still follow to this day. If you follow along I will discuss 5 archery shooting tips that you need to master in order to shoot like a pro. But beware! Mastering these archery tips may also ruin your love of this great sport. Why? Because it is very easy to establish bad habits in your shooting form that can eventually take the fun out not only a friendly round of 3D shooting at the local course, but from your bowstand as well. So continue if you dare, but I will rank these archery shooting tips in order of difficulty to master, so that you can decide which tip(s) you want to tackle first.
*After shooting Mathews bows exclusively since 1992, I can honestly say that the Halon 32, is by far my favorite hunting bow of them all (that's out of shooting nearly every model!)
1. Draw Length and a Solid "T"
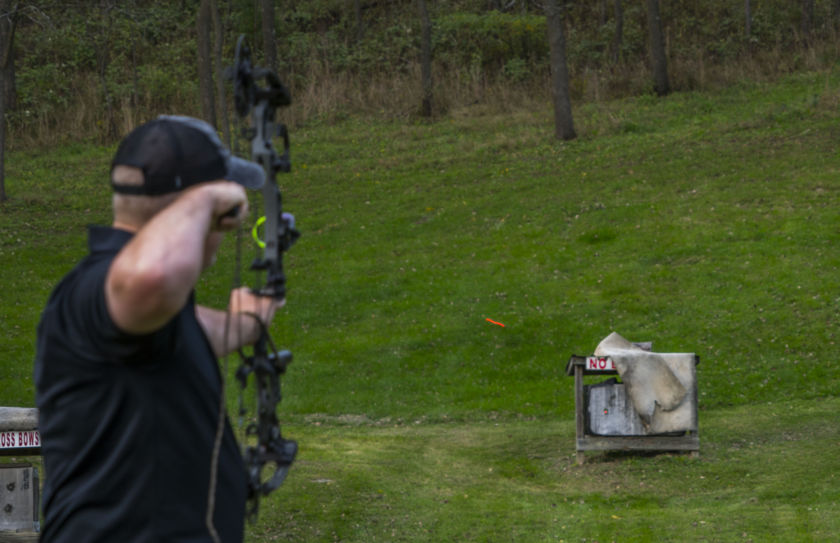
This is an easy one, because you really don't have to do anything else but buy a bow with the proper draw length, and then follow a few simple practices. In this first picture notice that my shoulders are square, and that my body from the back of my knees to the back of my head, forms a straight line. My bow arm (arm holding up the bow) elbow is slightly bent and it is very comfortable to not only draw the bow, but to hold the bow while locked into the target. Also, because my body is straight and my elbow has a slight bend, the string will be well away from my clothing at the point of the shot, which greatly reduces the liklihood of the string bouncing off my forearm and sending the arrow a foot or more away from the intended target. Your body, shoulders and arms should resemble a "T".
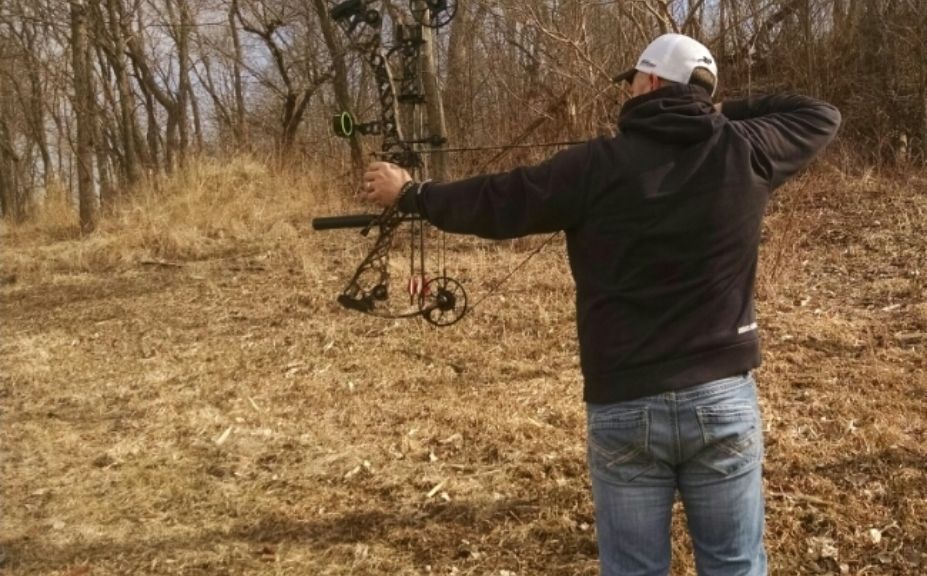
Have you ever seen a nasty bruise and cut on the inside of a bowhunter's forearm, after he or she smacked the string into it? After seeing some injuries that were so severe that they looked like a split grape, I want to make sure that it never happens to my kids or myself; and you should too! The next picture illustrates what it looks like when you shoot a draw length that is too long:
1. You have to straighten up your bow arm and roll your shoulder to the inside to "take up the slack".
2. You will have a slight bend in your lower back (on the right side for right-handed shooters), while your opposite hip is pushed forward to cause your body to create a slight curve away from the target.
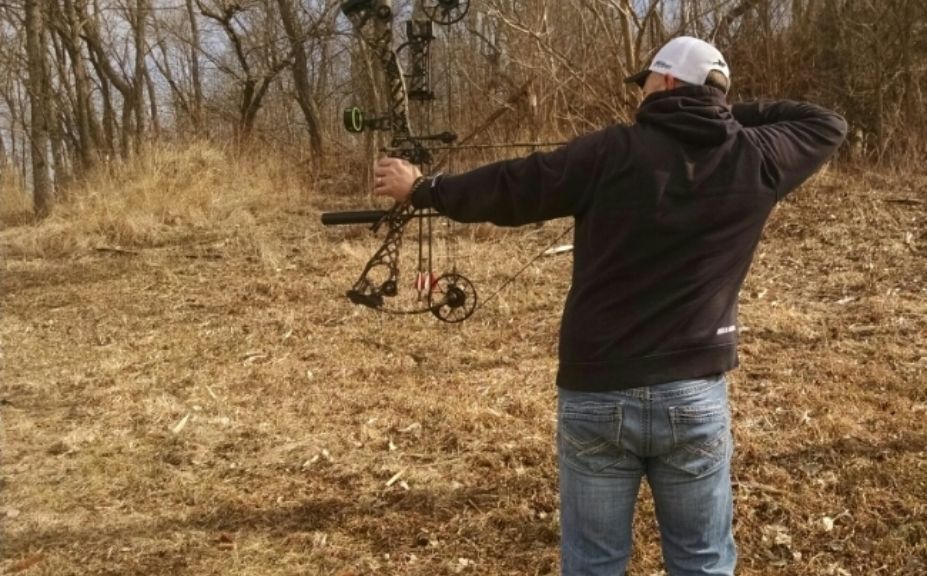
This is exactly why you may have seen your fellow bowhunters (or maybe yourself!) walking around with a pretty serious bruise on their forearms. Also, it's only a matter of time, but when you shoot this way you will eventually run into some pretty serious back issues. Have you ever seen some of the Facebook posts of people trying to show off their new bow? Many of those pictures contain very poor form that has obviously started with a bow length that is too long. Always keep in mind: Although you can shoot a bow a few inches shorter than your "natural draw" at a very high level for both accuracy and comfort, it is nearly impossible to do so with a draw length that is even a 1/2" too long, or longer.
This is a very easy archery shooting tip to master, because all it takes is buying a bow with the right draw length, and paying attention to your bow elbow, inside shoulder, and both your lower back and hips. My sons, Jake, Dante and Sam are shown above with what I believe are their correct draw lengths. Hey if 9, 12 and 13 year old boys can learn to master the proper draw length and body form, so can you!
2. A 3 Point Anchor
Once you have your proper draw length and body form established through the purchase of your bow, then a solid anchor point comes next. The 3 anchor points that I use are these:
1. Cheekbone
2. Tip of my nose
3. Peep Site
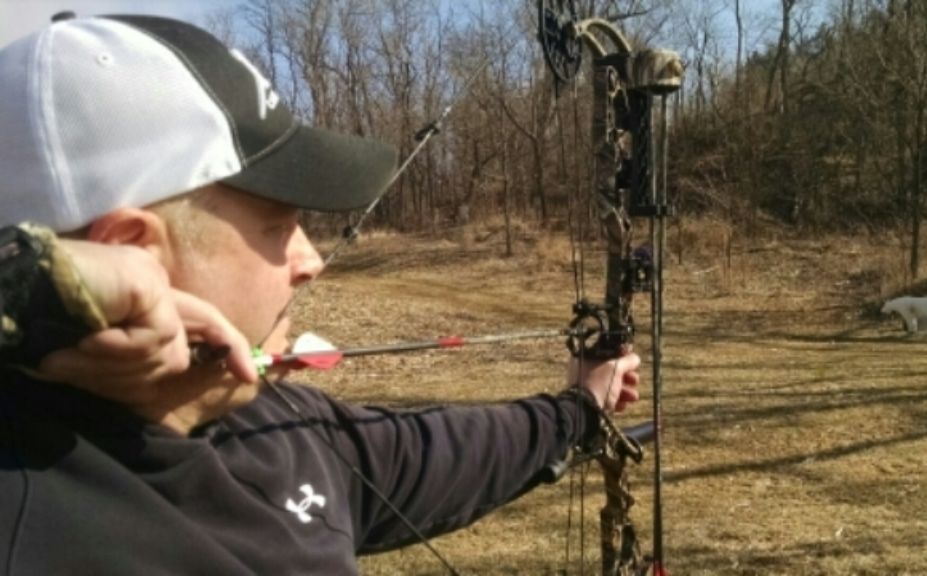
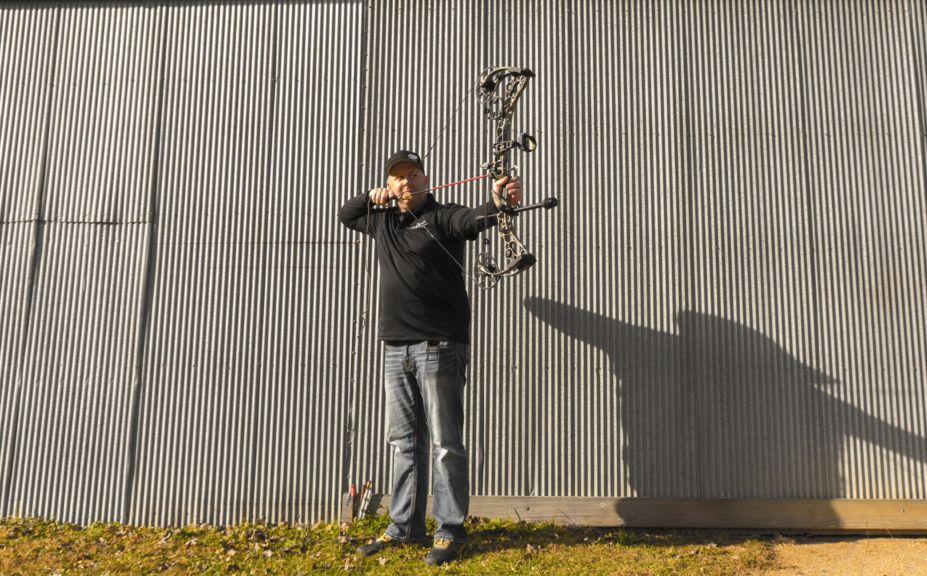
It doesn't matter if you are using an index style hunting release as pictured above, or a back tension release like first pictured in this article, a 3 point anchor can be used in any circumstance. Why does this matter? Because it doesn't matter in the heat of the moment if I am looking up or down, my anchor point will be locked in and ready to create a consistent shot no matter what the angle.
I personally prefer to use the tip of my nose instead of the side of my nose because on the side, there is a little play back and forth that can cause inconsistencies. However by using the tip of my nose, the string really can't slide forward or back without either leaving my nose...or pushing into my nose to the point of discomfort.
A Kisser:
Another sometimes popular point of anchor is when archer's use a "kisser button" that attaches above the knock point an aligns with the corner of the inside of the shooters mouth. This can work great, but it also adds weight towards the center of your bow string and slows the bow down by a few % points. At the same time while the button slips nicely into the corner of an archer's mouth while shooting, it can create problems while hunting with a facemask during cold weather. The warmer the mask, the thicker and less forgiving the material which then places the kisser button sometimes an 1/8th of an inch or more to the right and away from the face for a right handed shooter. This will cause the point of aim to hit several inches or more to the left downrange. Just something to consider when using a kisser button, and the larger the button, the more magnified the problems.
Like archery shooting tip #1, a 3 Point Anchor is pretty easy to master because it just takes paying attention to the basics, to form positive habits with each shot. My son Jake has been shooting the longest so he has it down pat. My stepson Dante has only shot a bow about 15 times but he is just about there, and my son Sam has a little further to go because he is a complete beginner.

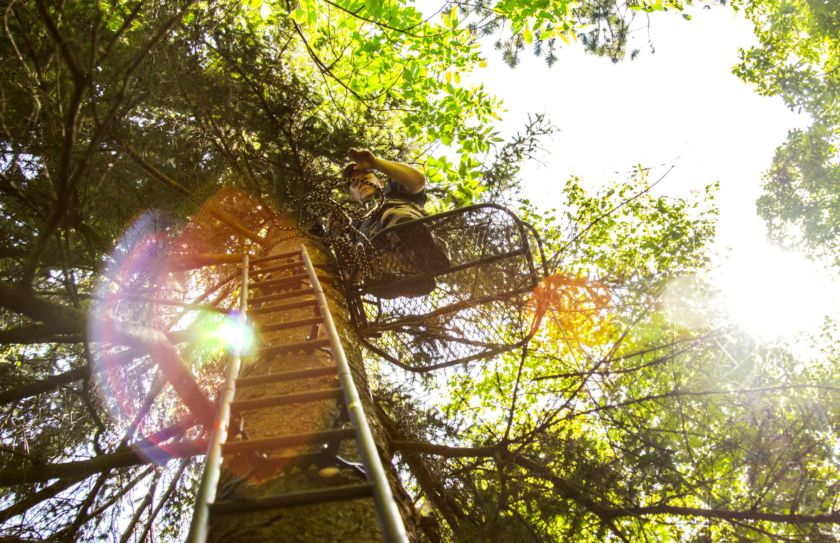
*A 3 point anchor system is critical when it comes to shooting accurately out of a tree stand! After the shot, it pays to have patience when blood trailing a wounded deer. For a complete strategy for tracking a bowshot deer, try reading my "Whitetail Blood Tracking Guide".
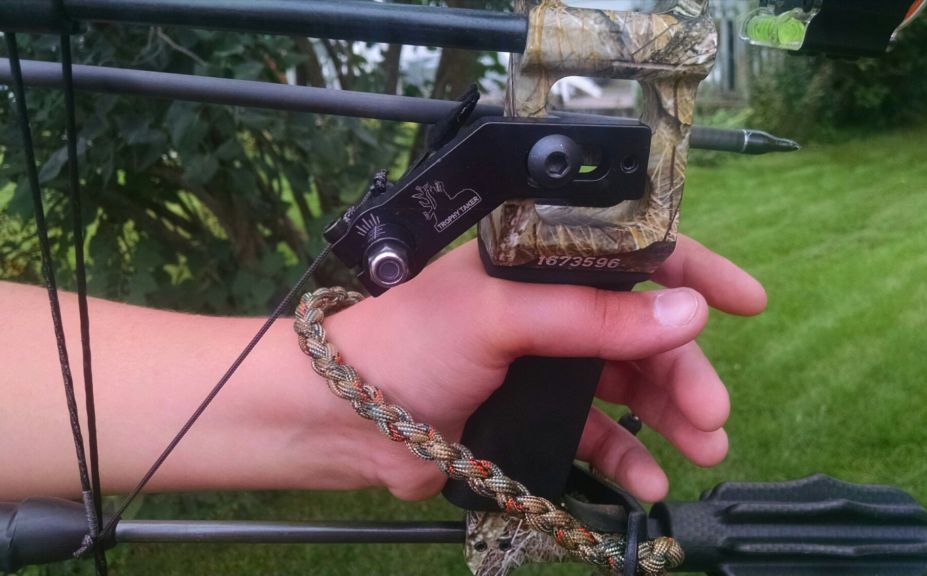
3. A Relaxed Grip
Ok, now we are turning the "difficulty knob" quite a bit! For this archery shooting tip I would like you to just grab your bow and place it in your hand, as if you were about to attach your release (or fingers) and pull back. Now, squeeze your bow grip. Again. And again. What happened? Unless your bow is anchored to the floor or to the top of your leg, it most likely twisted side-to-side quite a bit. Now, imagine what happens to your arrow's point of impact if you just barely squeeze your bow at the time of the shot.

Do you get inconsistent shots to the Right and Left of your point of aim? If you do, it's almost always because you are gripping your bow during the shot. What you need to master is this:
*Use a wrist sling like the one pictured above or even a simple piece of nylon camo rope cut, and tied to length. When you shoot, keep in mind that your bow hand and arm is simply holding up the bow...similar to a stick with a fork cut in it. In fact, a stick with a fork cut in it would be a heck of a lot more consistent! Your hand should neither grip the bow...or be forced open. Instead, your hand and finger should be as relaxed as much as possible: Before, During, and After the shot.
And that's what the wrist sling is for. When you make the shot, the bow should jump forward a bit, and you then rely on the sling to catch the bow and keep it from falling to the floor. Jim Morrow from MJC Archery in lower MI most likely still remembers the time that I pulled back a brand new Mathews he had just had shipped in. I couldn't wait to shoot it, and we both watched as the bow bounced on the floor when I shot without a sling. Of course I had formed a great habit throughout several years to not to grip my bow...but Jim found out that he should never let me pull a bow back again, without a sling on it. Really, it's his fault for teaching me the right way to shoot-I think?
*My Trilogy of advanced whitetail strategies is finished, including,"Whitetail Success By Design", "Food Plot Success By Design and Mature Buck Success by Design",to help you find mature bucks this hunting season!
I have to be honest, that this 3rd archery shooting tip is very tough to master! These are the 3 tips that I am teaching my 3 boys as they are growing into the sport of bowhunting, but I am very careful to not be too hard on them for this particular tip. It is definitely an "Advanced" shooting tip!
*Need to get a better grip? Then check out, "How To Shoot With a Relaxed Archery Grip".
4. Aiming
The act of properly taking an archery shot is one thing, but first you have to aim. And you have to aim very well! I have often been asked where the pin is at when I first draw back and look through the peep. Do you come in from the top? the bottom? the side? No I answer, "It's already where I want to hit". That's as much thought as spend on the process of drawing back, looking through the peep and placing the pin on the target. Your struggle to aim should never be about getting to the target, but instead staying on the target; and there is a big difference!
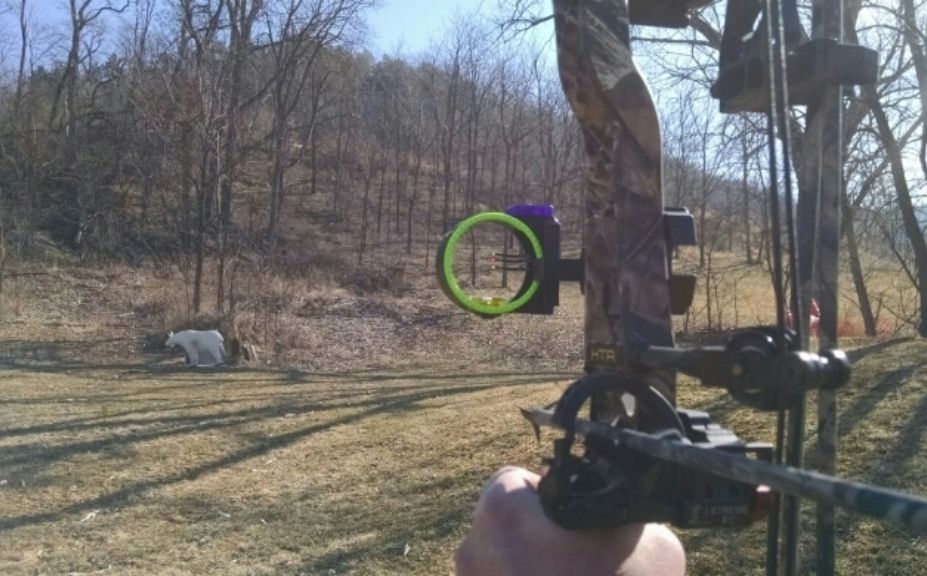
The process of aiming should be about "floating" over and around the point of impact. Some have even said in a "figure 8". You shouldn't worry about where you hit, as much as just relaxing and allowing your pin to float over, on and around the exact point of impact that you intend to hit. The stronger of a shooter that you are and the less you shake should dictate where you hit, and not some magical moment at which you decide to hammer the trigger when you fly by the point of aim from the top, bottom or side. That's called a "drive by shooting", and it can lead to an incredible amount of inconsistency and frustration.
I am not even sure that I like the idea of trying to form any pattern while aiming, including a figure 8. Instead, I like a natural float over the point of aim while waiting for, or determining exactly when the arrow is released. This of course is nearly the hardest archery shooting tip that you can attempt to master. Many, if not most never do! And it's unfortunate because the process of floating on the target is no different then when shooting a rifle or hand gun as well. If you have a great release (which is the hardest tip to master) than it is very easy to call your shot, meaning that wherever the pin was at when the shot went off, that's exactly and precisely where the arrow should hit. With proper form and adherence to these 5 archery shooting tips it becomes very easy to site in your bow with just a handful of shots because you can simple move the pin to where the arrow hit, while knowing that your form and process to take the shot is consistent enough to call your shot.
5. The Release
You may have noticed that when combined with the picture below, I have 3 different style of releases that I use. I actually use them all, because if you master tips 1-4, then your level of accuracy should not be determined by the type of release that you use. In fact, I like to use all 3 to remind myself of that at times! However, I shoot the 2 index trigger releases far different than the back tension Carter release, even though I still expect similar results.
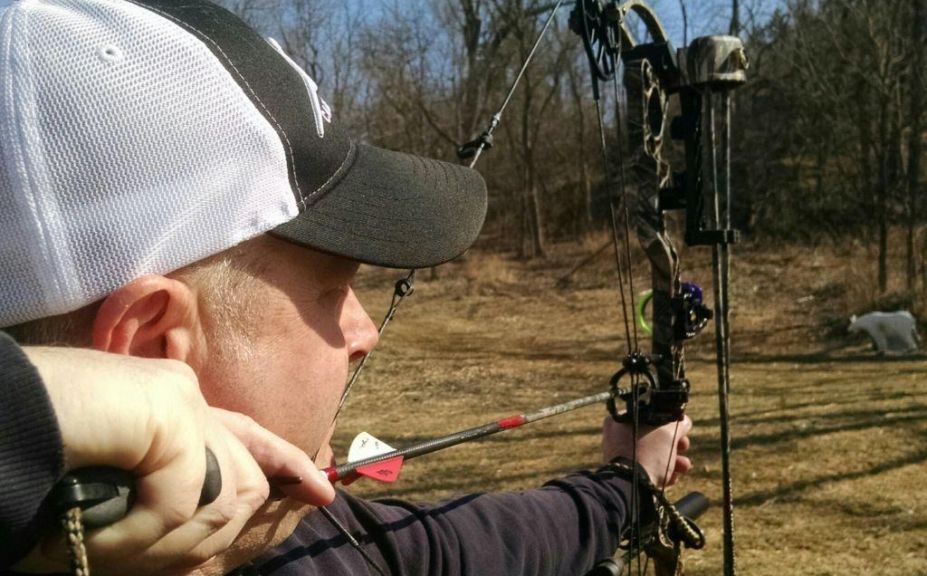
The key to making making a great shot is a controlled release. What does "Controlled" mean? It means that in the process of making the shot, that you don't do anything to destroy the first 4 tips of proper body form, anchor point, relaxed grip and a floating aim. If when you release the arrow you do not interfere with those first 4 archery shooting tips, than you have succeeded, no matter where the arrow hits. And I really mean, "no matter where the arrow hits", so please let me explain:
*An archer's shot is no different than a golfer's swing or a baseball player's batting form. If the form is correct, your accuracy will eventually come around. I am reminded of that constantly as I have increased my shooting time lately due to starting to teach my 3 boys to shoot, and practice often. I have experienced flashes of my old self where I run off 30 spots in a row on an indoor Vegas or 5 spot target, but then will suddenly hit 8" right on a 3D target at 30 yards. My archery muscules may seem old and weak, but at the same time my form has remained true throughout the years so my shots are never too far off...and they can always be "called". As my muscule memory has improved throughout the last seveal weeks, so has my accuracy. Again, if your form is good...archery, batting or even golf, the results will soon follow.
One of my favorite ways to teach my boys, as well as to use myself is to continue to shoot a "blank bale". In blank bale practice we simply shoot at a target without an aiming spot at 10' or less. I started the practice in 1994 following the encouragement of Jim Morrow, and I still use it to this day. It can be the single most important portion of your practice regime, while allowing you to positively repeat the 5 archery shooting tips over, and over again while building both muscle and mental memory that you then carry over to the range or field.
During the process of aiming my finger is always on the trigger, the entire time. It doesn't matter if I am using a thumb trigger on a Carter release, or an index trigger on a Scott release...my trigger is always engaged. However, there is a huge difference between the 2 trigger styles!
*I never use my Carter release for hunting. I can't. I can't because when hunting I need to determine exactly the split second that the shot needs to take place and that is not how I use my back tension release. Instead, I allow the pin to continually float on the target, constantly pushing and pulling evenly by contracting the muscles in my back. Eventually, the top 3 fingers rotate the release around enough to force the trigger into my thumb, at which time the release fires. The entire process of the shot takes 10-12 seconds or less, but I physically never (and I mean never) actually move my thumb to make the trigger fire. Instead, it is a complete surprise...and that actually creates the ultimate level of repeated accuracy that I enjoy while shooting both indoor spots and outdoor 3D targets.
*My index trigger releases are essentially used the same way. I keep a relaxed grip, I keep a 3 point anchor and I float on the target while aiming at a defined spot. The only difference is that while aiming, I actually physically determine by squeezing the index trigger firmly, when the bow is fired. I still push and pull, I still float, I still have a relaxed grip...but I determine exactly when the bow is fired which is critical for deer hunting situations. Therefore...I never mix the 2 styles of releases. I use my back tension Carter releases for target and for reinforced proper form, and then my index triggers for 3D hunting practice, and hunting.
The process of making the shot is extremely difficult to master. I have given you the steps to making the perfect shot, but so many have tried, failed and literally ruined their love of archery while attempting to complete each step accurately. However, I think it is still important to learn how to use the process of the archery shooting tips to form the basis of all of your archery and bowhunting endeavors. Archery shooting tip #5 is definetly the most difficult, by far, to perfect!
Conclusion
After a few ASA National Championships in the Open and Semi-Pro divisions, years of top level finishes at the State of MI level, many indoor spot rounds of 60Xs and even taking home a little cash throughout the years, my competitive shooting days are likely over and have been over for a long time. However, my love for shooting accurately and with the proper form will hopefully never leave me. I will try to teach my boys and anyone else who wants to learn, but that doesn't mean that I will teach them to carry through to the end, all 5 archery shooting tips. Something that I will tell them though, is that those 5 tips should be mastered in order. For example, it makes no sense to work on making the perfect shot, if make "drive by shootings" while gripping your bow.
As my boys progress maybe you will find me competing out there right along with them and although my aim and accuracy may not be as true as it once was, I will still be attempting to make the perfect shot each and every time I fire my bow. I find that perfection is a harder goal to achieve the older I get, but at the same time I find that I can settle back down to the foundation of the 5 archery shooting tips by shooting a few dozen arrows into a blank bale.
*BTW, I have to mention that Jim Morrow from MJC Archery in lower MI (2 locations) is one of the best archery coaches in the entire country. I am no coach, but Jim sure is! If you are in his area and you can find a way to get him to spend the time to work with you (he is extremely busy and booked often), he may just be the absolute best coach that you can possibly find. Visit Jim's site at http://www.mjcarcheryinc.com/ and look him up if you would like to take your archery skills to the highest level that they can be.