*Make sure not to miss my, "Hinge Cut Bedding Guide", which discusses how much or how little to cut on your land.
Although I typically spend a lot more time designing whitetail parcels than actually cutting them, in 2013 I had the pleasure of working with a particular client from Southern MI while firing up the chainsaw on his 40 acre parcel. Gone are the days of cutting for clients a couple of dozen days or more in a year (boss's orders!), but even when considering cool deer bedding creations and downwind blocking features, my absolute favorite habitat features are chainsaw travel corridors!
The Plan
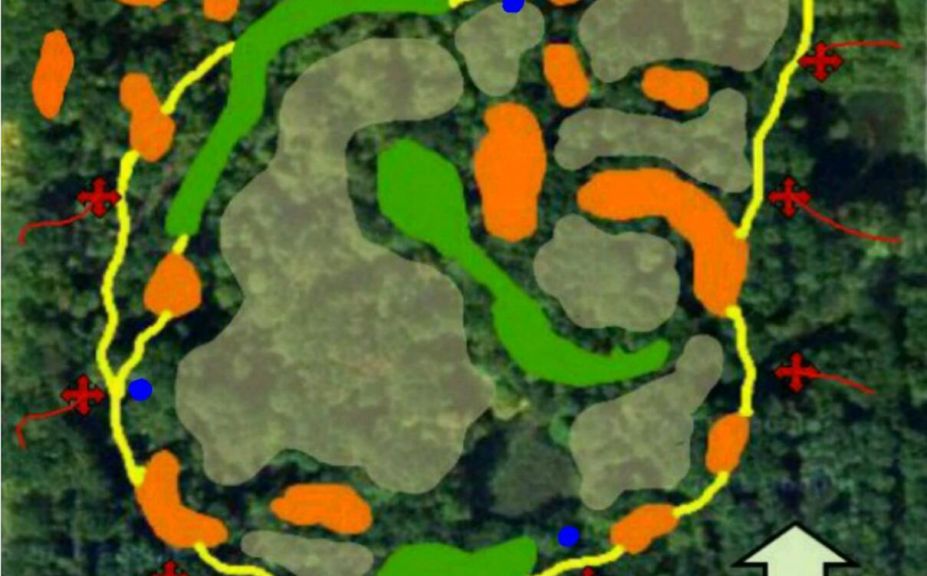
"Joe's" parcel featured a great deal of variety in a small package. 20-40' elevation changes rolled from front to back and side to side to form an almost
"burmed" valley of smaller hardwood ridges within the center of the parcel. Due to the topography, the interior of the land included roughly 25 acres that were completely hidden while walking the exterior borders.
*Bedding Areas
(orange) were recommended to be cut and created on interior facing benches, points, or ridge tops so that bedded deer could be hidden and facing away from hunters while accessing along the parcel borders.
*Food Plots
(green) were located to be just as hidden and secure as the bedding areas (a must) and by using
*Travel Corridors
(yellow) to "connect the dots" of high quality improvements
*Some lands need extremely narrow corridors, and some call for a lot more width! Using a "hoop style" tight corridor on the wrong land can actually repel deer from using it. To make sure that you are accurately installing the correct corridor for your land, please read "Deer Corridors; Hoop Dreams".
*Stand Locations
(red x with trail access) could be located within intersections that feature a high-level of predictable use
*By adding much needed Waterholes (blue) within some of the "high and dry" ridge areas, the travel patterns could be even further enhanced to not only offer some exceptional ambush locations, but to keep hunters from spooking deer while accessing stand locations through "non-improved" habitat with the wind and time of day to their advantage.
*This chainsaw travel corridor method, as well as most any other whitetail related strategy, is covered in my recently completely trilogy of Advanced Whitetail Strategy books, including the recently published"Mature Buck Success by Design", which details how to scout, prepare, forecast for and consistently kill mature bucks.
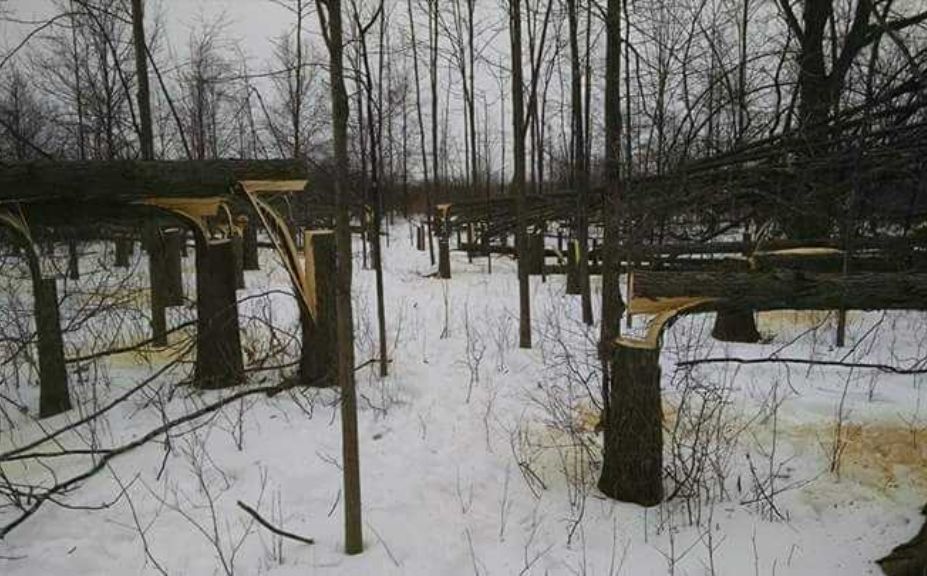
The bedding areas include 1/2 acre to 1 acre virtually complete clearcuts that include several "pockets" of 5-10 feet in diameter surrounded by a web of trails to connect each one to the next within the entire cluster of downed timber. Within the large, interior portion of the parcel the canopy was recommended to be reduced to 50% or less by cutting mature "cull" trees and low timber-value species designed to drastically improve both the amount of cover, and food across the entire parcel. By keeping the best of the improvements towards the exterior of this parcel, the table was set for the installation of over 1000' of travel corridors running parallel to the parcel borders to influence the deer to move within the border parcels, and not off of the parcel borders. I typically attempt to keep from pointing improvements towards any parcel borders because each improvement serves as one giant "arrow" of deer movement, meaning; once a deer gets pointed in 1 direction, it's often hard to get him to stop!
Days of Cutting
My initial visit with Joe was in early February, and then he hired me to come back in mid-July for some follow-up chainsaw work. The temperatures were hot, the habitat thick and full of bugs, and we both (several times each) found the hornets to be extremely aggitated at the seemingly destructive nature of our activities!
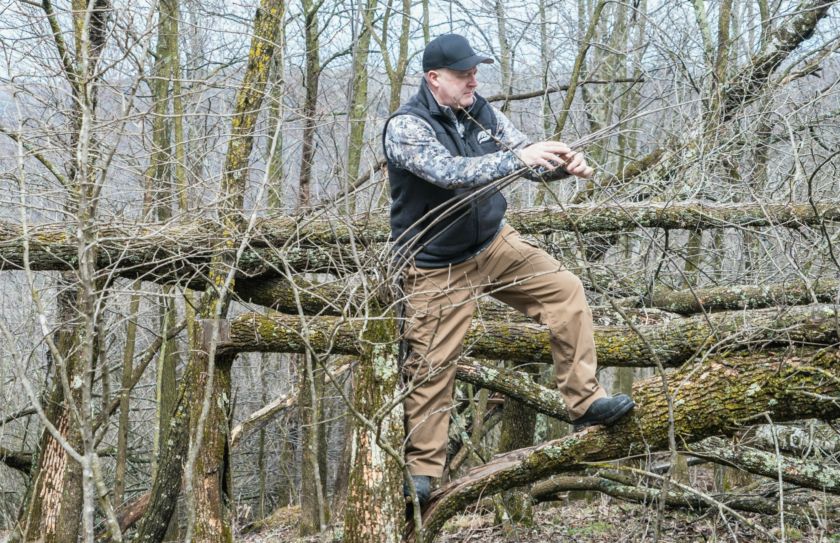
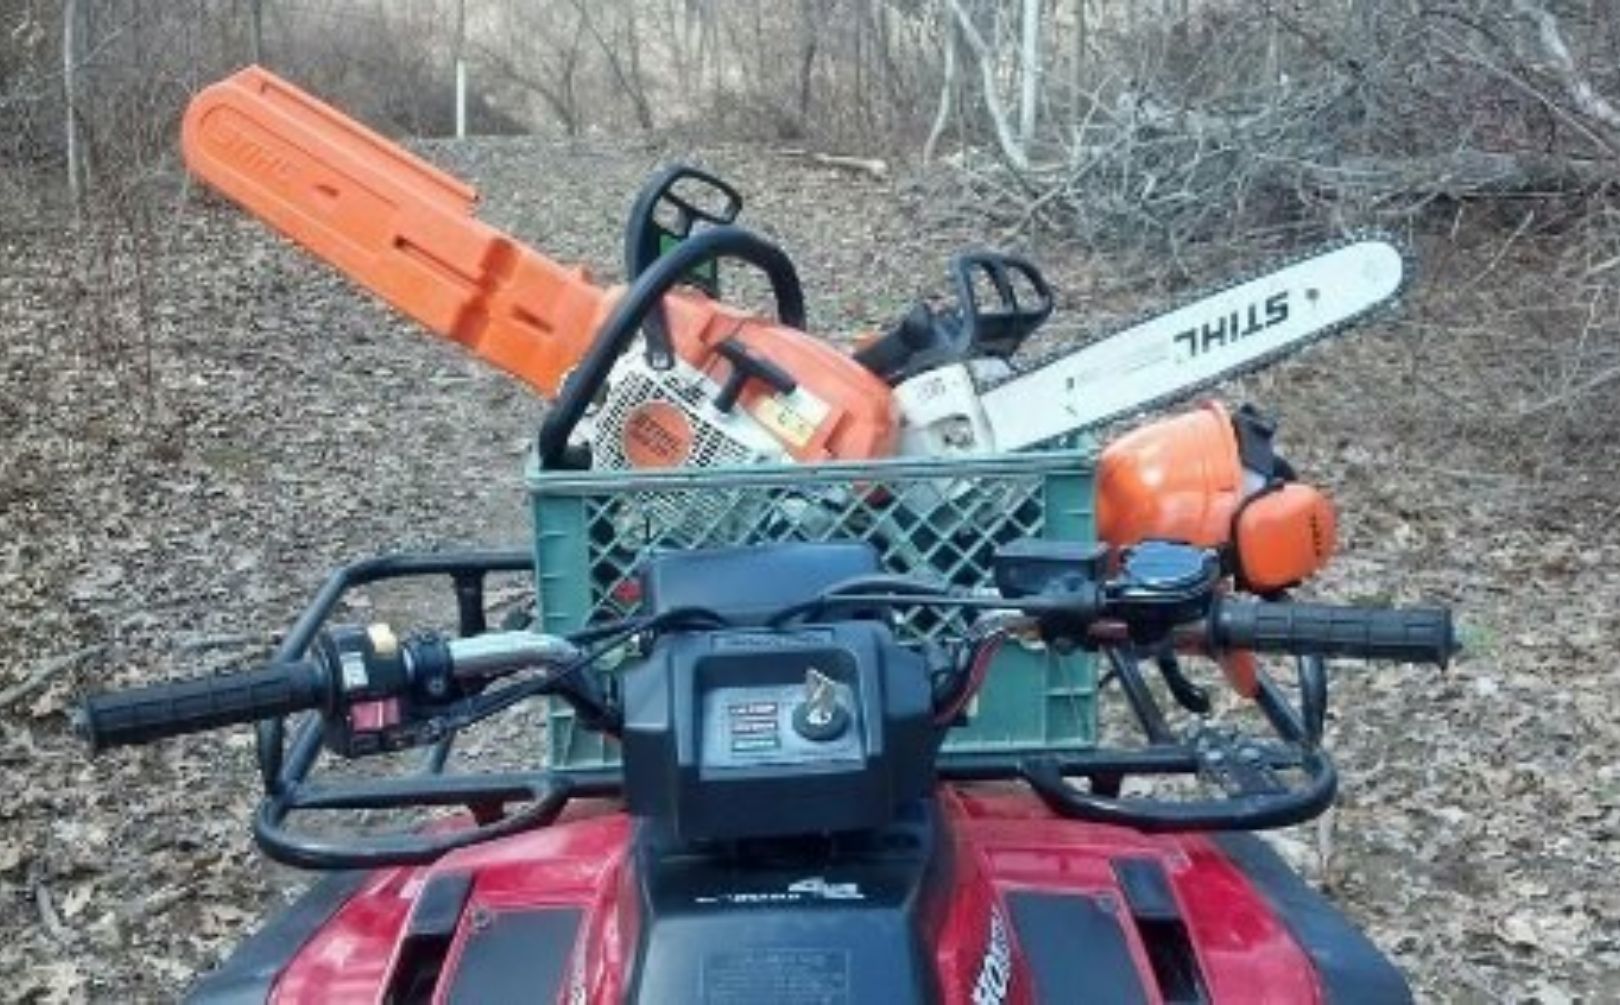
To begin with the 4-day cutting project that would include the travel corridors, several bedding areas, and food plot trails, the most mature of cull-trees were selected to drop safely to the forest floor. Although I personally use a helmet, eye protection, ear protection, and cutting chaps I typically seem to manage one or two scrapes, bumps or bruises. Creating deer cuttings should only be completed by those with extensive experience!
When starting a chainsawn travel corridor the most mature of trees should be dropped first, while being cut to fall into holes or openings within the forest to create more holes to continue cutting into. When trees are available to cut to the outside of the intended travel corridor, they are cut last, and hinge-cut low to be used as blocking debris to further define the intended deer movements. Whenever possible, your cuttings should leave logs and debris to lay perpendicular to the deer trail. Existing deer trails, and the benches, saddles and natural funnels present within the "lay of the land" can be used and even "painted" to act as a visual aid in cutting. In all habitat creations, the more "natural" the better!
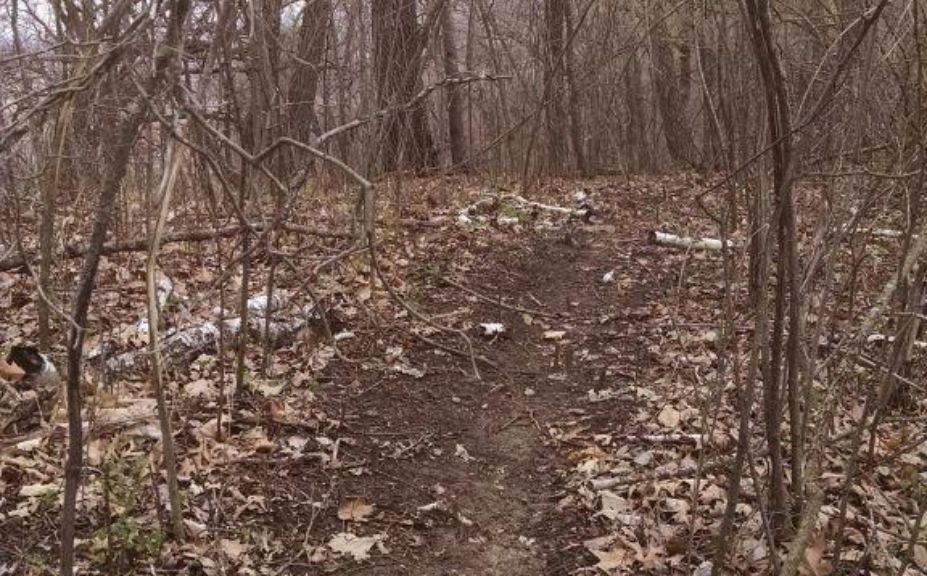
Of course, the travel corridor is primarily used to set-up high quality stand location opportunities and this corridor is no exception! In the following photo, you can just start to see the opening the corridor is eventually running into, heading in a Northerly direction. A future stand location is located just to the left of the corridor approximately 25 yards away and behind a wall of cuttings to conceal access and departure routes to the stand. The opening that the corridor is running into is actually a newly created "Trail Food Plot" approximately 15-20' wide and over 400' long. Also, within bow-shot of the stand location, a 110 gallon waterhole tank will be intalled to not only further enhance and define the new "deer trail", but to offer an outstanding spot to kill a deer! Any waterhole I typically recommend to install is in a location to take advantage of deer that are "sitting dry" all day with little to no water, and on the way to evening food source. Dry bedding and defined chainsaw travel corridors combine a great spot to take advantage of a thirsty monster while bowhunting. Also, make sure to do yourself a favor and follow my 1 simple rule about creating waterholes: Never install a waterhole that can not be shot from a bowstand! Keep in mind that while waterholes do not typically attract any more deer to your land, they do have incredible impact on intended travel corridors. If your waterhole is just about of bowrange or even worse, you can actually be hurting your hunting opportunities by defining deer travel away from your stand locations.
Looking back at where the corridor meets the opening, the tree to be used for the stand location is to the right side of the picture and was marked with an orange "T". The access to the stand is from behind the tree and perpendicular to the intended line of deer movement. A long pile of fallen trees will successfully block the hunter's access to the stand, and keeps deer away from hunter-scented hand-rails and climbing steps. The waterhole will be placed just about where I am standing, and to the left, offering a 25 yard shot as deer either exit, or enter the travel corridor from the trail food plot. Because the trail plot is long, winding, and narrow, deer can be expect to travel and feed along the entire length, making access for morning hunts possible with a low probability of bumping feeding deer within "spooking" range. At the same time, evening hunts will feature great, "deer-free" access as deer can be counted on to be located within adjacent, hidden bedding areas positioned to take advantage of the both the travel corridor and the overall created line of deer movement.
As deer travel into the trail plot, they will enjoy not only the hunting season food source that was planted soon after, including brassicas, oats, and rye, but they will also have enjoyed that the food source is hidden, secure, and flanked by cuttings and hardwood regeneration on either side. Deer can feed, drink, and travel with a very low chance of ever encountering human scent, site, or sound, on their way to distant bedding areas or chainsaw travel corridors that compliment additional stand locations to be used with alternate wind directions. Trees that would create too much additional work for clearing, can be "girdled" with cuttings used to kill the tree within 2-3 years, allowing regeneration to take place on either side of the plot, as additional sunlight will aid in the ultimate growth of the food plot.
The Balance of Cuttings
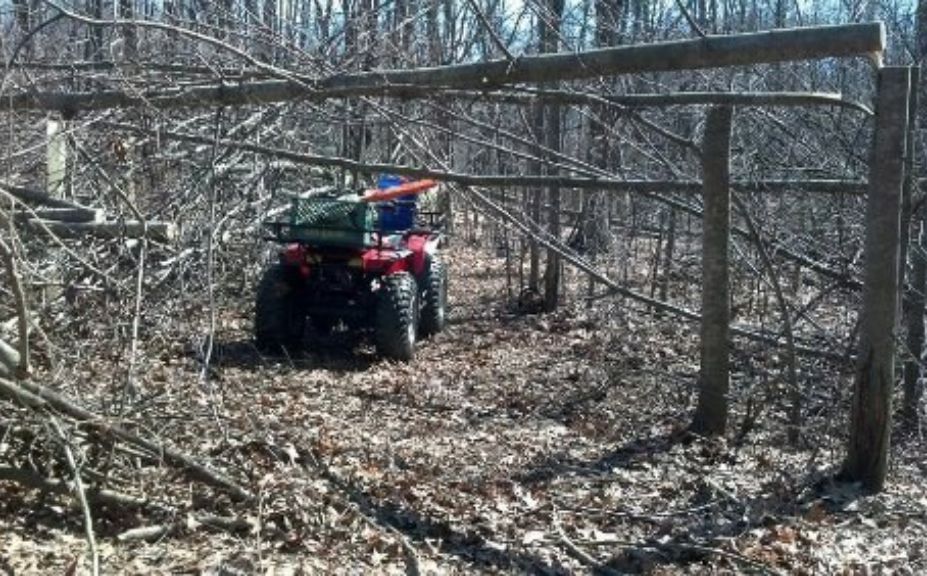
How wide, and how thick thick should your chainsaw travel corridors be? For an average guide on a typically balanced habitat parcel; if you can drive an ATV through it, it is just about right. What is a typically balanced habitat parcel? A piece of land that is within 50:50 ag to cover area is fairly typical.
*100% cover wilderness settings and low deer numbers require a higher level of natural-looking corridor creations with plenty of exterior escape routes and limited screening cover
*Major ag and open areas with high deer numbers can benefit from extremely tight, non-ATV sized travel corridors with solid screening cover along the sides.
Once the intended travel corridor has been cut, cleared of large debris, and defined, a machine such as a DR brushtrimmer can be used to clear a virtual "bike path" of a potential deer trails. A follow-up spraying of a ground-clearing herbicide such as Pramitrol 25E to eventually form a "single-track" deer trail from "Point A" to "Point B" can be the "icing on the cake".
While taking a look at the included parcel design, note the highleted white portion of the intended "line of movement" including food, travel corridor, water, stand locations, and bedding areas located in the SW corner. Although the entire 40 acre line of deer movement was completed, this is the portion of the parcel that the pictures used within this article were taken from.
*Often, you will see guys attempting to slam a "one size fits all" habitat feature recommendation in any region, any state any county and every parcel. In my experience, there is no 1 balance of size that works on more than 30-40% of the time on any 1 parcel. So, it pays to follow the natural clues on the lands that you hunt and/or manage, and then do your best to mimic those conditions.
Conclusion
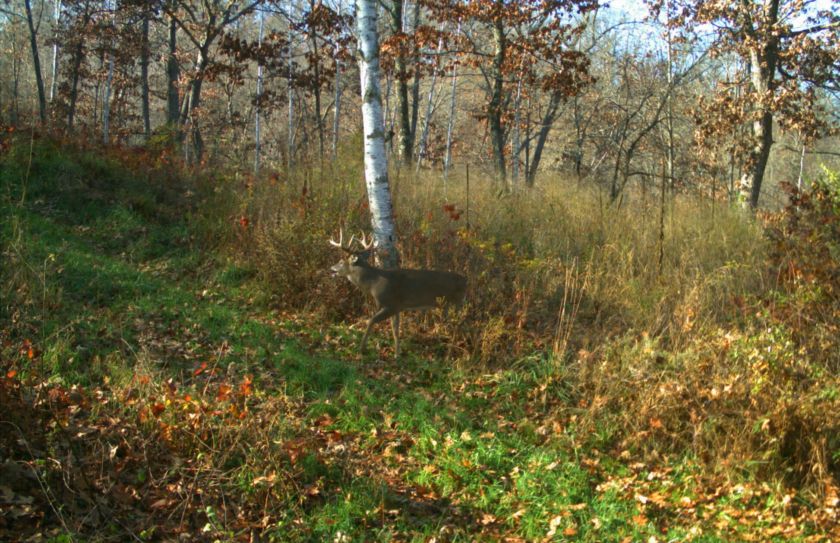
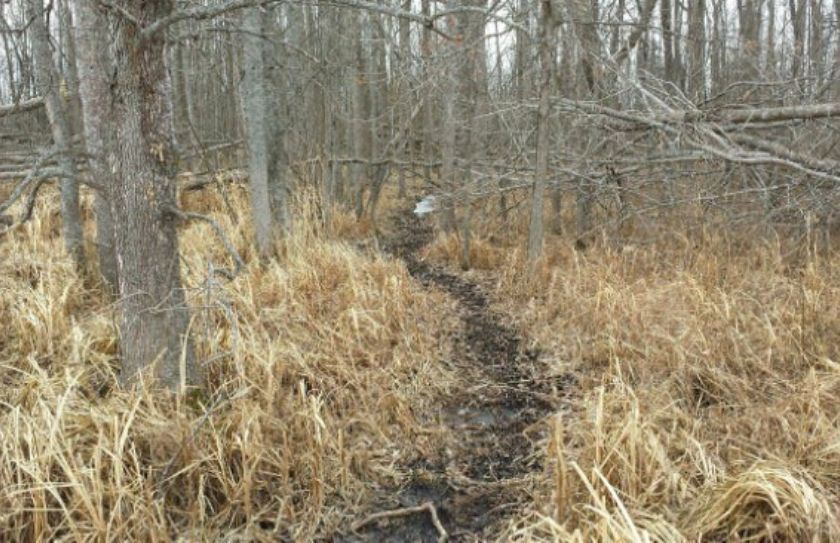
It does not take long for a chainsaw travel corridor to begin to be noticed by the local deer herd! Do you have any? Are you planning to create a few? Right now is the perfect time to start to define how the deer move on the lands that you hunt. The 2013 picture below, illustrates just how quickly a deeply cut deer trail that leads directly past a deer stand and into adjacent bedding cover can form. If you are an experienced chainsaw user or know a person who is, I encourage you to tap into the incredibly high level of definition that you can create by installing your next chainsaw travel corridor!