WOW...Hinge cut bedding techniques for deer have come an incredibly long ways in the last 20 years! Have you noticed? If you want to skip right to the basics of creating hinge cut bedding areas...fast forward to a few paragraphs below.
The year was 2008 and my Minnesota client couldn't wait to show me his hinge cut bedding area. Was it the great deer sign, including pellet counts, buck rubs and deer hair? None of the above. In fact, the reason he couldn't wait to show me the location was because his efforts were not working. As we stared down into the bench from 200 yards above and across the hollow, he pointed to one of the several bedding areas that were installed on his land. "Why aren't they working?" he asked. The canopies were perfect, the tie down's were professionally created, but would you believe that the hinge cut bedding areas were just not attracting any deer at all, let alone the mature bucks that he was hoping for? There were some extremely obvious reasons his bedding areas were being avoided, but with the incredible amount of hinge cut bedding info that could be found online and in various deer management circles at the time, it was pretty easy to understand why the landowner had missed the mark with his hinge cut bedding area creations: "Information Overload". Below, I will detail the process of what I have seen work throughout the states I have visited clients within, as well as what hasn't worked, so that you can be armed with the knowledge to not only avoid the mistakes that I have witnessed dozens of times, but the mistakes that I have personally created as well...
Taking a Step Back in Time
The year was 1999 and I was exploring anything and everything as it pertained to both deer management and habitat improvement. Throughout the process a MI food plot legend, Ed Spinnazola, was an incredible resource of information whom I had relied on heavily for food plotting, since 1997. Ed's guidance for planting food plots during the "early years", shaped many of the planting methods that I have used, created and experimented with since 1996. However in 1999 Ed told me about a practice that was completely new to me: Creating hinge cut bedding areas. Ed didn't go into too much detail, but he hammered home the simple basics of how to create a hinge cut. With chainsaw in hand and with reckless abandon in the forecast, I proceeded to immediately hinge cut the first few bedding area creations on my UP of MI deer hunting parcel. Did I end up with great deer sign, including pellet counts, buck rubs and deer hair? Um unfortunately...none of the above. And through that experience, my hinge cutting bedding journey began.
*Make sure to check out the strategies in this video, so that you don't miss out on any of the details that will lead you to hinge cutting success!
In the early years I learned another valuable lesson, and it didn't have to do with hinging trees for bedding, but instead clearing branches to create bedding pockets. I found that all that was needed within those small, 1/8th acre pockets of conifer surrounded by tag alder, was to clean out the mess below 5' high. By removing branches to create "rooms with a view" on the inside, deer would literally begin to use the new bedding areas within a few weeks. If there was a stand of soft maple nearby, I hinged the maple to offer daytime browse, offering the deer both food, and cover. That open pocket bedding concept is applicable to anywhere a whitetail roams: 1. Give the deer an opening 2. The ability to bed on a level, dry platform 3. Offer the appropriate amount of side cover and distance required for a view
If you establish those 3 things, anywhere a whitetail roams you can dictate where deer bed, in particular if you are offering daytime browsing opportunity while creating your cuttings.
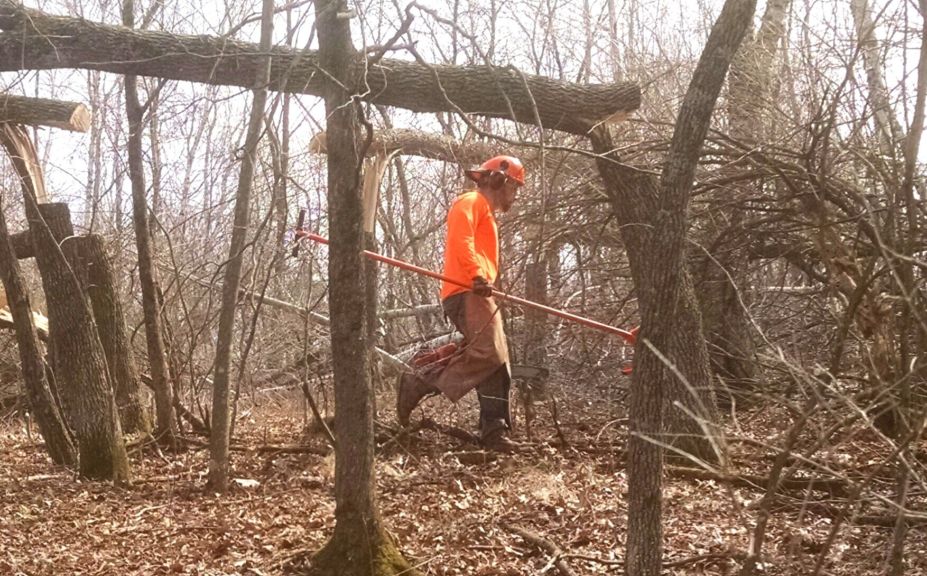
*What is a "Hinge Cut" and how do you do it safely? Jim Brauker is an individual whom I consider to be the best in the field, for knowing how to safely hinge cut a tree. I strongly encourage you to check out Jim's safety instructional video below before ever hitting the woods!
Hinge Cut Bedding Observations
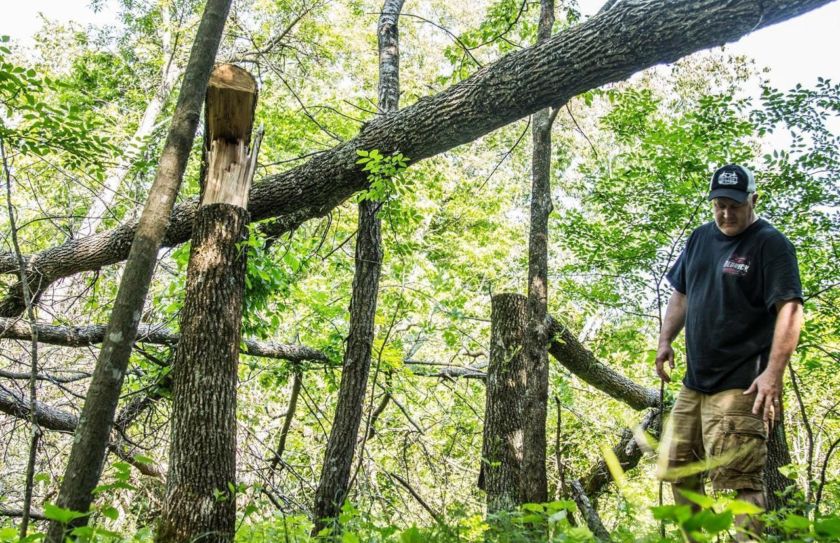
While I consider it a pure luxury to be able to have observed hundreds of hinge cut bedding areas while touring the country designing deer parcels after they have been made, there is no single bedding area experience that was more important within the learning process than that of my own. Looking back, it is easy to see why my own hinge cut bedding areas initially failed to work, but at the time I was greatly puzzled! I started exploring my resources, which included nationally knowing deer research biologist, John Ozoga. I have always loved talking to John, and probably one of my most favorite topic surrounds his experiences with his favorite, individual mature bucks that he studied in a 1 square mile enclosure located in Shingleton, MI. He told me about 1 buck in particular that was incredibly difficult to tracker down, even though it was wearing a tracking collar. Locating the mature monster was the easy part, but getting close to him was an entirely different matter. The buck simply used the terrain to his advantage. Sure, the crew could get fairly close, but not before the wary old monarch could see them coming. The buck chose a "room with a view". The location wasn't very thick, but the elevation allowed the buck to see for quite a distance in virtually any direction, which made the buck impossible to approach to a distance within close proximity.
*Here are Advanced deer bedding articles that you can read for a variety of additional resources:
1. Deer Bedding Area Tactics 101
2. Scouting Deer Bedding Areas
3. Buck and Doe Bedding Areas
4. Deer Browse For Daytime Bedding
5. Switchgrass Plantings For Deer Bedding
The observations of that particular mature buck, as well as my own hinge cutting experiences were related! It was then that I began the realization of the first common myth of creating deer beds. For years I had heard that, "It can't be too thick", when it came to finding a place that a buck would call his daytime home, when in actuality it could be too thick; pretty easily! In my early hinge cut bedding area creations, I created bedding areas that were extremely thick, and in John Ozoga's observations of an old monarch, the buck chose a room with a view.
I make mistakes like everyone else, but I also like to think that I learn from my mistakes as well. Creating a bedding area that was too thick was just the tip of the iceberg in the process of understanding how to accurately create hinge cut bedding areas. I hope that you can enjoy the following hinge cut bedding area guide, based on the observations of hundreds of parcels throughout the years in the North 1/2 of the Country, as well as my own personal successes and failures. Your success will not ultimately be found by following an exact set of hinge cut bedding basics, but instead through a needed level of flexibility to make sure that you are matching your efforts to the needs of the deer, in your location.
Hinge Cut Bedding Area Guide
What is the best way to create a hinge cut bedding area? Simply, with the exception of the safest way possible, there is no "best" way; and that is the point. If you are looking for a cookie-cutter way to install a buck or doe hinge cut bedding area, than this article is not for you, because there isn't one.
1. Mimic the Local Conditions:
Are you located in a Northern OH coverless ag region? Than you may be able to cram 30 deer into a 10 acre patch of incredibly thick, and compartmentalized patch of cover. Are you located within a remote MN wilderness setting? Than you may need 300 acres or more for a herd of 30 deer, to provide the space required for deer that are used to a "room with a view".
The conditions needed across the range of whitetails dictate a sliding scale of appropriate bedding prescriptions for success. While extremely tight, and canopied bedding areas or travel corridors may be just the ticket in a flat, Southern MI coverless ag setting, those same features will most likely be completely avoided in a Northern low deer density area. From experience, I would estimate that the process of creating bedding canopies and hooped travel corridors is appropriate for 1/3rd of the whitetail range, or less. In many areas, you will more closely match the bedding conditions that are appropriate for your area, by hinging cutting away from bedding areas, instead of over them. This is a critical practice as the acres of cover per deer increases, as well as the overall number of predators per acre. Here are a few hints that may relate to your land, as shown by the extreme ends of the sliding scale for appropriate hinge cut bedding area activities:
*Coverless Ag regions
1. Canopied bedding areas, and less than 20' of site in most directions
2. Hooped, hinged and tied travel corridors, at least 4' off the ground, with trails 2-3' wide or lessl
3. Even within a thick area like this, the side cover is more critical than the canopy.
4. Actual bedding areas can be 4-6' in diameter or less
*Heavy cover, wilderness regions with high predator populations
1. Avoid canopied bedding areas with the exception of clumps of cedar, pine and other natural occuring bedding conditions. Within these areas, clear ALL limbs from 4-5' high, and lower.
2. At least 50-100' of site in most directions...often more.
3. Side cover is still critical, but in coverless ag regions the tops of hinges, logs and debris can be less than 10' away. In wilderness settings, the larger the obstruction, the further the deer will tolerate it's proximity. Focus on hinges at least 10-20' away from actual deer beds, or more.
4. A great, natural example of a Northern deer bedding area would be a small cedar cluster of 2-3 trees, surrounded by tag alder, red osier dogwood and clumps of aspen or red maple. When the leaves are down, a bedded deer can still see 30-50 yards+, although surrounded by a high stem count.
Your land may lie somewhere between, but it is always best to scout the balance that the local deer choose on their own to bed naturally within, before attempting to mimic preferred bedding areas.
2. Side Cover is King:
Consider a 160 acre ag field of soybeans, with an 1/8th of an acre swale of red maple in the middle. Now, use the maple to create a hinge cut, canopied masterpiece with every tree hinged inward to form a canopy resembling a giant trampoline. You may attract some Summer bedding activity by a bachelor group of bucks or doe family group, but that is about it. During the Fall you will be able to look from one fencerow across to the other, right through and under the canopy. Although the canopy may look pretty cool, it will offer a fairly poor area to bed for local deer herd during October through May.
Now, imagine that you take the outer row or two of maples, and hinge them outward, and onto the ground. Picture a "wagon wheel". What you have created is a canopy-less bedding hotspot that is completely screened from the outside. Deer can hide within; you can't see them, they can't see you. Even though the 1/8 of an acre swale will lack any canopy at all, deer will gravitate to the bedding pocket because side cover is the most critical aspect of bedding cover. Why do folks add a log to the interior of a canopied bedding area? Because it is often the only form of side cover that could possibly attract a deer, after using all of the potential side cover to form the canopy.
Somewhere along the way, much more focus began to be placed on the "canopy" of a bedding area, while the side cover was all but forgotten. But what I have experienced many times over is that while a cool looking canopy can raise the quality level of a specific bedding area by a few % points, the bedding area is typically useless without the appropriate balance of side cover specific to your area. Also, if a canopy collapses due to rot, snow or both, the entire bedding area can be impassable for deer (again, it can really be too thick).
An appropriate level of side cover can be created by hinging away from the intended bedding platform for deer. When in doubt, always choose to create side cover over canopy. You can really never go wrong in any habitat or herd condition, by offering side cover, in particular if you have matched the desired amount of site distance required by the local herd.
3. Different Hinge Cut bedding sizes for either buck, or doe?
Bucks and doe family groups choose their bedding areas by proximity to food and stress. In a nutshell, bucks will choose the bedding area with the least amount of stress that is outside of the daily movement patterns of the local deer herd, and doe family groups will choose closest adequate bedding cover adjacent to their preferred food source.
Sure, you could make a case that a doe family group requires a larger size bedding area than that of a mature buck; but you could also make a case that a mature buck requires a higher degree of visibility and site within a larger bedding area, no different than the monster that than John Ozoga chased in the deer enclosure. I have found that if you create the same conditions for both sex when it comes to accurately applying the perfectly sized bedding conditions for the deer in your area, you can't go wrong. Instead, by focusing on the location as it relates to food and stress, you will have accomplished the largest set of bedding priorities of all.
4. Choose a "room with a view"
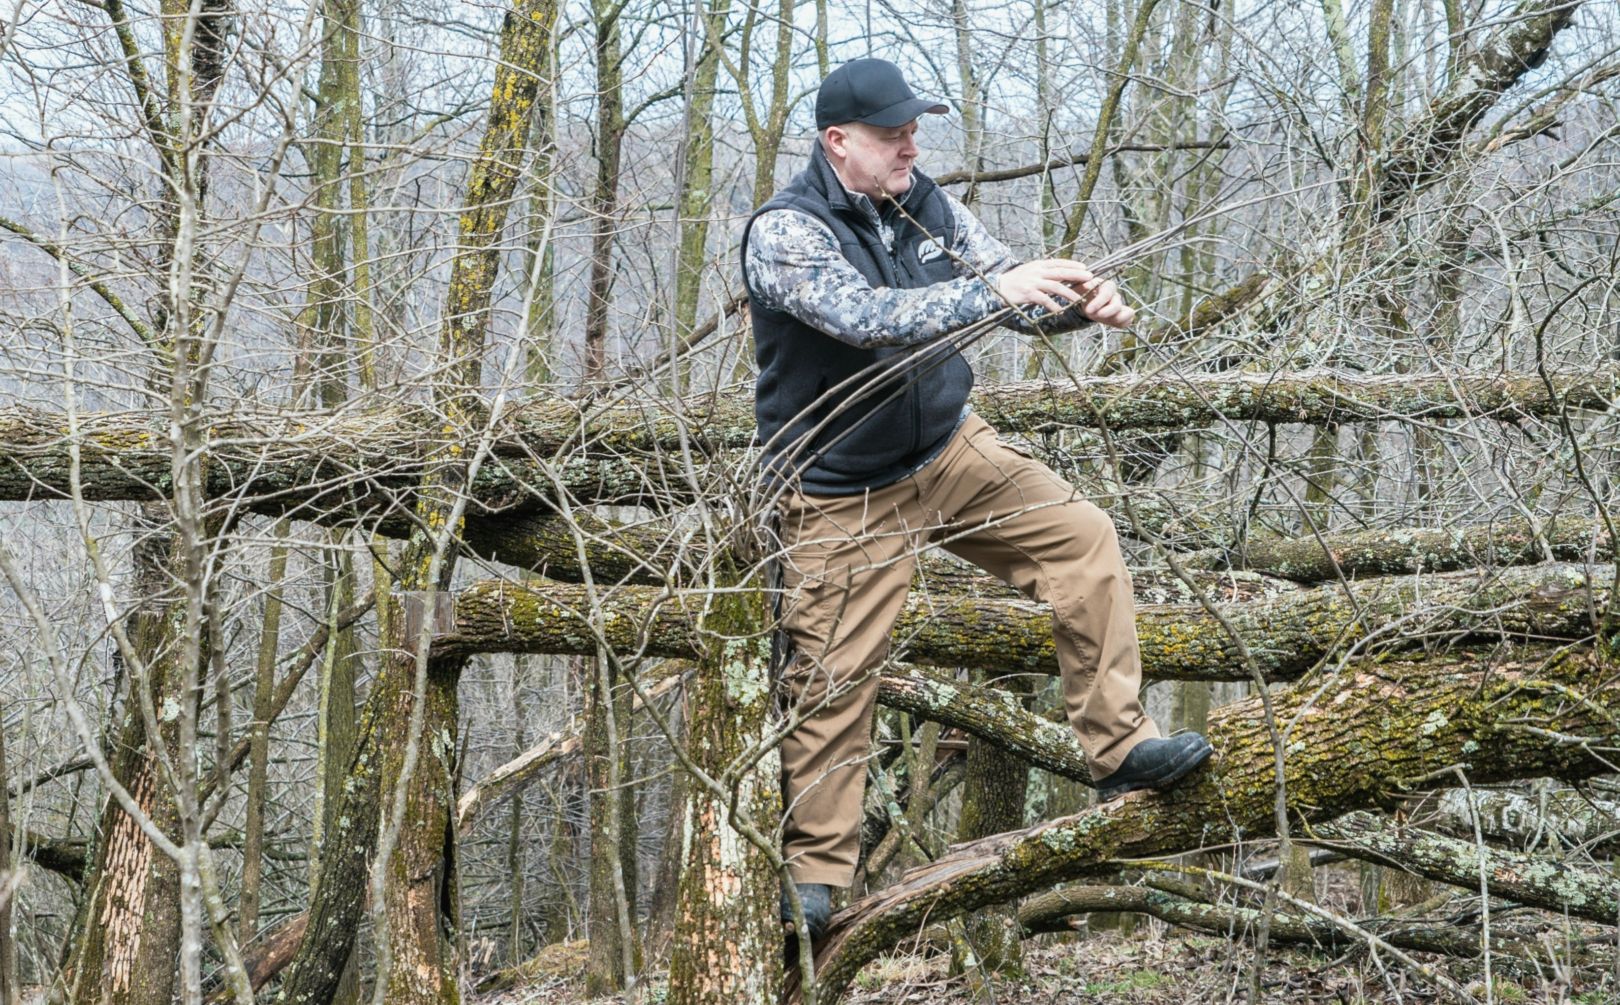
Deer love to bed on a slight rise, regardless of the region. They also love a view, with how much of a view determined by the sliding scale dictated by coverless ag to wilderness settings. My personal preference is to start creating hinge cuts with waist high, horizontal cuts. But I prefer to cut away and to the outside of where I expect the deer to bed. In the process, you will certainly create hinges that a deer can bed under or along side, but your primary goal should be the opening within, and not the canopy itself.
5. How thick is too thick?
No matter which region that you are in, make sure that you use one simple test: If you can easily walk through the bedding area yourself, you are establishing an accurately applied cutting. Within wilderness settings...focus on being able to drive an ATV through the bedding area; and that will be just about right.
6. Zero Dead Ends
When the # of dead exceeds the # of pass through trails for deer using the bedding area, the deer will tend to avoid the area. Deer want and need to escape within at least a 180 degree window, and that is in coverless ag regions. When you throw in the added predator factor and extremely vast amounts of cover within wilderness settings, deer desire and need to be able to escape in virtually every direction.
Conclusion
So what was "wrong" with the 2008 client's bedding area? No side cover. You could also make a case that the amount of canopy was too much, but when we could stand 200 yards away and look into the actual deer beds under the canopy, the amount of side cover was definitely lacking.
MN, WI, PA, MI, OH, IN, DE, IA, MO, Maryland and all points in between; it has been very apparent that deer choose quite a sliding scale of size, for their preferred bedding requirements. The most important aspect of creating hinge cut bedding areas is safety first, but after that keep in mind that there is absolutely no, "one size fits all" set of deer bedding conditions. I ask you to consider not only my hinge cut bedding observations around the country, but by my own personal mistakes since initially beginning my hinge cutting journey many years ago. Creating a bedding area is an incredible tool that you have at your disposal. It takes time to accurately create your bedding areas, but that is also part of the fun of getting to know the needs of the local deer herd through scouting and observation.